

Shonen TCG · Guides
Dragon Ball Fusion World Energy Guide: Master Your Turns

Reviewing
Dragon Ball Super Card Game Fusion World
Dragon Ball Fusion World energy guide: the Energy Area is the engine every Fusion World deck uses, and learning when to charge separates a planned curve from a hand that runs out of options.
Unlike most TCG resource systems, Fusion World lets you turn a card from your hand into Energy each turn. You are not drawing land or finding resource tokens. You are deciding which card in your hand becomes fuel and whether another resource helps the current plan.
TL;DR: Charging one card each turn is a useful early-game default, but the official rule makes charging optional. Build enough Energy to pay your actual curve, use 5 to 6 as a generic midrange test point rather than a rule, and remember that Energy cards are visible. A 44-plus chargeable-card count can be a starting heuristic for a 50-card list, not a required minimum.
Dragon Ball Fusion World energy guide: quick answer
During each Charge Phase, you may place one card from your hand face-up in your Energy Area. You rest those cards to pay for Battle Cards, Extra Cards, and Leader skills, subject to any specified color cost. Rested Energy readies again in the next Charge Phase. There is no separate resource deck: cards from your deck can become Energy, which makes every charge decision a real trade-off.
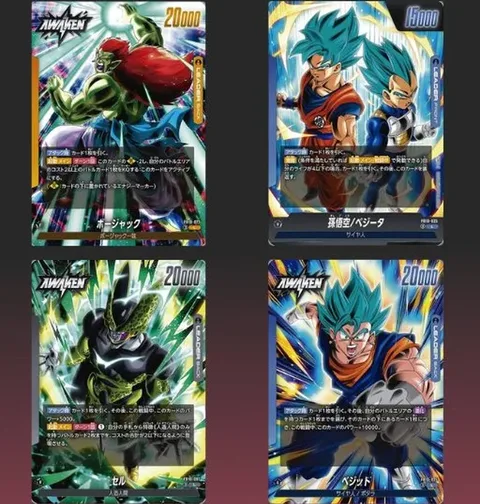 Real Japanese-language Fusion World card collage showing card costs and power values, not an Energy Area diagram.
Key Takeaways
- Treat an early charge as the default, then check whether your current curve actually needs another resource.
- Use 5 to 6 Energy as a generic midrange test point, not a universal Leader target.
- Energy cards are placed face-up. Your opponent reads your hand through your energy pile.
- There is no official 44-card minimum. Test 44 or more cards you are willing to charge in a 50-card list, then adjust for the deck's actual plan.
- Surplus energy converts into hand advantage: when costs are paid easily, you keep more cards for combo defense.
- The "energy trap" is over-charging past your needs at the expense of combo cards you needed to survive.
- Read your Leader's actual Awakening condition before planning its energy turn; life thresholds and payoffs vary by card.
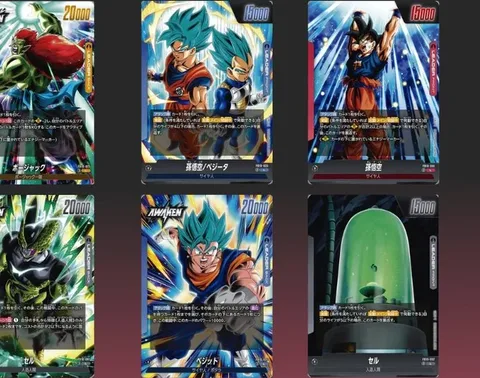 Real Japanese-language Fusion World card collage with several card examples, including Goku and Cell.
How the Energy System Works
The Energy Area in Fusion World sits to the side of your Leader card on the mat. At the start of the game it is empty. Each turn, during the Charge Phase (before your Main Phase), you may take one card from your hand and place it face-up into the Energy Area.
That card is now a permanent resource. It does not go to the Drop Area (discard pile). It does not return to your hand. It stays in the Energy Area for the rest of the game unless a card effect specifically moves it.
When you want to play a card with a cost, you rest the required number of energy cards by turning them sideways. A 4-cost Battle Card requires 4 energy rested. At the start of your next turn, all rested energy unrests automatically, ready to be spent again.
Two points matter here for new players. First, paying a normal cost rests Energy cards rather than sending them to the Drop Area, so they can be used again after the next Charge Phase. Card effects can still move or remove Energy. Second, Energy cards are open information. Both players can see the cards in your Energy Area, which creates an information layer advanced players can use.
For a full breakdown of the game's core mechanics, the Dragon Ball Super Card Game Fusion World beginner guide covers the full turn structure before energy management becomes the relevant decision point.
Dragon Ball Fusion World energy guide: the Charge Phase decision
The decision you face in the Charge Phase has two parts: whether adding Energy helps this turn's plan, and which card is the least costly to give up. In a curve-based list, charging early is often the right default, but the rule lets you skip it and a Leader or matchup can change the answer.
This is where Fusion World's skill ceiling lives. Every card in your hand has a priority score based on the current game state:
Charge these cards first: Low-impact cards at your current energy level. A 2-cost card when you already have 5 energy. Cards that are redundant copies when you already have the effect you need. Cards that are good-to-have later but not critical now.
Keep these cards in hand: Combo pieces you expect to use this turn or next. High-value plays that match your current energy level. Cards that answer your opponent's expected next play.
The face-up rule adds another dimension: if you charge a premium card, your opponent now knows you do not have it in hand. A skilled opponent adjusts their plays based on what they can read in your Energy Area. Some players deliberately charge a strong card they actually drew a second copy of, creating false information about their hand. This is a mid-level technique but worth knowing as you develop your read on this system.
GODEEPER: The Evolve mechanic uses energy in a specific way that interacts with the Charge Phase decision. Dragon Ball Fusion World Evolve Mechanic Explained →
Step-by-Step: Running Your Charge Phase Every Turn
Use this sequence at the start of every turn to make your Charge Phase decision consistent instead of guesswork.
1. Check your turn number against the curve target. Compare where you are to the example table below. If you are behind the cost of the play you need, charging is usually more valuable; if you can already pay the turn's plan, preserving a card may be better.
2. Scan your hand for the weakest card. Look for low-impact cards at your current energy level, redundant copies of an effect you already have, or cards that are good later but not needed right now. That card is your default charge candidate.
3. Set aside what you need to keep. Combo pieces you expect to use this turn or next, high-value plays that match your current energy level, and any card that answers your opponent's likely next play all stay in hand.
4. Read both energy piles before committing. Check what your own face-up energy already tells your opponent, and check theirs for clues about what they're holding back. Adjust your charge choice if a deliberate false read is worth the tempo.
5. Charge the card, then rest Energy for your Main Phase plays. Spend it on the highest-value play your hand supports, and check your Leader's exact Awakening text before committing resources around a life threshold.
6. Stop charging once you hit your list's plateau. At 5 to 6 Energy with no expensive Extra Cards or skills to support, skipping the charge may preserve more value. A ramp or control list can need more, while a low-curve list can stop earlier.
Building Your Energy Curve
Energy curve refers to how much Energy a list wants available at each turn. The table below is a practical starting baseline for a generic midrange list, not a rule or a claim about every current Leader:
| Turn | Target Energy |
|---|---|
| 1 | 1 |
| 2 | 2 |
| 3 | 3 |
| 4 | 4 |
| 5 | 5 |
| 6+ | 5 to 6 (plateau) |
Different Leaders and lists peak at different costs. A generic midrange list can start testing around 5 or 6 Energy, while a ramp plan may want 7 or more and a low-curve aggro list may stop earlier. Treat the curve as a deck-building hypothesis and compare it with the cards you actually need to cast.
The deck-building implication is about willingness, not eligibility. The current official rules allow a 50-to-60-card deck of Battle Cards and Extra Cards, with a separate Leader. You start with six cards and may redraw once, then draw during the Charge Phase each turn; the current rule manual does not remove the first player's first-turn draw. For a 50-card list, 44 to 46 cards that you are comfortable charging can be a useful test range, but there is no official chargeable-card quota.
When building a new deck, check the Dragon Ball Fusion World best starter decks 2026 guide to see how pre-built decks handle this ratio before modifying your own list.
Energy and the Combo System
Combos in Fusion World work by playing Battle Cards face-up into the Combo Area during an attack. Those cards add their combo power value to the attacking or defending card, depending on the side using the combo. Combo cards come from your hand and remain visible while the battle resolves.
Energy and combos are not directly linked. You do not spend energy to combo. But the connection is real: the more efficiently you spend your energy on your plays, the more cards stay in your hand for combo defense.
A player who spends 5 energy perfectly on turn 5 (playing a 5-cost card for full value) keeps all their remaining hand cards available to combo. A player who spends 3 energy on a 3-cost because that was the best they could afford has likely played a weaker card AND has the same hand size afterward. The energy-efficient player consistently has more combo options.
Extra Cards can have costs that make additional Energy worthwhile. Some have [Activate Battle] skills and can be used during the opponent's turn, while others are Main Phase effects. Check the exact timing on the cards in your list before leaving Energy open.
GODEEPER: The FB10 Cross Force set introduced new leaders with energy-intensive Extra Card packages. Dragon Ball Fusion World FB10 Cross Force Set Guide →
Common Energy Mistakes
Skipping charges without a plan. Players moving from other TCGs can forget that charging is optional and can also overcorrect by skipping without checking the curve. If you need the next cost, charge a lower-impact card; if you already have enough Energy, preserve the card for a reason.
Over-charging past your curve. The "energy trap" is the flip side of the above. Some players charge every turn through turn 8, building 8 energy when their leader's most expensive play costs 5. Those extra charges were combo cards they burned. Recognizing when you have hit your energy plateau and should stop charging is a sign of a developing player.
Charging your only combo pieces. If your hand is three 3-power combo cards and one chargeable 2-cost Battle Card, charge the Battle Card. Combo cards are more valuable in hand than in the Energy Area. When your full hand is combo pieces and nothing else, skipping the charge is correct.
Ignoring the face-up information. New players forget their energy is visible. Before deciding what to charge, look at what your energy is telling your opponent and what theirs is telling you. If you have charged your two premium removal pieces, your opponent knows to play around the absence of that removal.
Misreading the Awakening turn. Awakening conditions differ by Leader. Read the front and back of the card before deciding whether you need a particular Energy count on the turn your Life changes.
Advanced Energy Management
Once the baseline is correct, these techniques apply in competitive play.
Deliberate information denial. Charge a card you hold two copies of. Your opponent now reads your Energy Area and believes you lack that card in hand. This works best with high-value single plays like key Extra Cards. The cost is chargeability: you are still within your energy curve, but you give your opponent a wrong read on your defense options.
Tempo charges. In matchups where you are not under pressure in the early turns (control vs. control), you can charge a slightly higher-priority card because you have more turns before you need full combo defense. Versus aggro, never charge a combo piece you expect to need within two turns.
Reading opponent energy for timing. If your opponent has charged low-power cards and you can see their energy pile has no obvious removal, this is the correct window to commit your strongest Battle Card to the field. Conversely, if their energy pile shows they charged their combo pieces (meaning they plan to play high-cost cards instead), prepare your combo defense for a large swing.
Energy as a flex resource for Extra Cards. Some Extra Cards can be activated during the opponent's turn, but not all of them. If your list has a reactive Extra Card, reserve enough unspent Energy after your Main Phase plan to pay its specified cost.
For the full competitive context on how leaders use energy differently, see the Dragon Ball Fusion World complete guide 2026.
Related Reading
- Dragon Ball Fusion World Ki Mechanic Explained: How Ki interacts with the energy system for leaders that key off it.
- Dragon Ball Fusion World FB10 Vegito Deck Guide: A real decklist showing energy-curve theory applied to one of FB10's top leaders.
- Dragon Ball Fusion World FB10 Gohan Deck Guide: Another full decklist, useful for comparing how different leaders spend their energy.
- Dragon Ball Fusion World FB10 Meta Tier List: See which energy-hungry leaders are actually winning post-launch.
Frequently Asked Questions
How does the energy system work in Dragon Ball Fusion World? During the Charge Phase, you may place one card from your hand face-up in your Energy Area. That card normally remains there as a resource. You rest Energy cards to pay for Battle Cards, Extra Cards, and skills, then those cards ready in the next Charge Phase.
Can you charge any card as energy in Fusion World? Yes. Every card in your deck is eligible to be charged into the Energy Area. This is unlike some other TCGs that require dedicated resource cards. The decision of which card to charge is one of the most skill-intensive choices in the game.
What is the ideal energy count at each stage of the game? There is no universal target. Use the costs and skills in your Leader and deck as the benchmark. A generic midrange list can test one new Energy each turn until 5 or 6, then stop when additional Energy no longer improves the plan.
When should you skip charging energy in Fusion World? Charging is optional, so skip it when preserving a specific card is more valuable than adding Energy. That can happen after your list reaches the costs it needs, when an Extra Card must stay in hand, or when your defensive hand is more important than another resource. Do not use a fixed turn number as the rule.
How does energy interact with the combo system? Energy itself does not power combos directly. Combos use cards from your hand placed face-up in the Combo Area. Having enough Energy lets you play Battle Cards without spending your full hand, which can leave more cards available for combo defense.
What percentage of my deck should be chargeable in Fusion World? There is no official chargeable-card minimum. For a 50-card list, 44 or more cards that you are willing to charge can be a useful starting heuristic, but tune it to your curve and effects. The Leader is separate from the 50-to-60-card deck.
Does the opponent see which card you charged as energy? Yes. Energy cards in Fusion World are placed face-up, visible to both players. Your opponent can read your energy pile to understand which cards you are no longer holding. Skilled players sometimes charge a premium card they have two copies of to give false information about their hand composition.
References
- Dragon Ball Super Card Game Fusion World official rules page: current official rules index, rule updates, and Sealed-format resources.
- Dragon Ball Super Card Game Fusion World comprehensive rules v1.06: Charge Phase order, Energy Area visibility, deck construction, Combo Area, and battle timing.
- Fusion World official Charge Phase FAQ: official answers on optional charging, opening draw timing, and Energy Area limits.
Was this guide helpful?
About the author
Competitive TCG Analyst
Competitive One Piece TCG player and deck builder with 3 years of tournament experience. Covers meta analysis, tier lists, and leader builds.
- 3 years competitive OPTCG tournament experience
- Regional top 8 finisher
- Deck builder and meta analyst
- Covers every set since OP-01
Keep reading
Dragon Ball Fusion World Best Leaders FB10: All 5 Ranked
Guides · 12 min
Dragon Ball Fusion World Best Cards for Beginners 2026
Guides · 12 min
Dragon Ball Fusion World FB10 Meta: 4-Week Snapshot
Guides · 12 min

Dragon Ball Fusion World Vegito Guide: FB10 Snapshot
Guides · 15 min

Dragon Ball Fusion World FB11: Brightness of Hope (Oct 2026)
Guides · 8 min

Dragon Ball Fusion World Standard Format Guide 2026
Guides · 16 min
Dragon Ball Fusion World vs Pokemon TCG: 2026 Guide
Guides · 14 min
Dragon Ball Fusion World FB10 SCR Cards: Art & Value Guide
Guides · 12 min
Disclaimer
This article is published for informational and entertainment purposes. It does not constitute professional financial, legal, or technical advice. Game performance, online services, patch schedules, and store listings change. Verify critical details (pricing, system requirements, regional availability) with publishers and storefronts before you buy. Affiliate links, where present, help support our editorial work and are labelled in our affiliate disclosure.