Loading…
Shonen TCG · General
Union Arena InuYasha deck archetypes for EN August 2026
9 min readBy Michael Riley

Reviewing
Union Arena
Three Union Arena InuYasha deck archetypes have emerged from JP community play since the UA50BT release on May 29, 2026. EN launches August 14 as UE23BT, which gives players building now exactly the right window to study six weeks of JP data before spending money.
Each archetype uses the same core Jewel Shard mechanic, but they close games in completely different ways.
TL;DR: Three InuYasha archetypes from JP: Counter Rush (Full Demon InuYasha wins on counter max), Sesshomaru Control (board pressure through Sesshomaru SR), and Hybrid (both finishers, Kagome draw engine). Kagome Higurashi (Rare) and Miroku (Uncommon) are shared pieces across all three. EN launches August 14, 2026.
Union Arena InuYasha deck archetypes? (quick answer)
The Jewel Shard counter mechanic runs through everything in this set. Miroku places counters on your characters. Kagome and Kikyo spend or trigger off those counters through their Purification abilities. Full Demon InuYasha and Sesshomaru are the payoffs for different approaches to building that counter stack.
Counter Rush wins by reaching counter maximum fast and closing with Full Demon InuYasha. Sesshomaru Control wins by establishing an unanswerable board presence. Hybrid builds sacrifice some speed for redundancy, running both finisher lines.
GODEEPER: If you're still deciding whether to pick up the JP set or wait for EN, the import vs. wait breakdown explains pricing and availability. Union Arena InuYasha EN Buying Guide
Archetype 1: Counter Rush
Counter Rush is the most popular archetype in JP community play. The game plan is linear enough to learn quickly and explosive enough to close games before slower decks can stabilize.
The engine runs on three pieces.
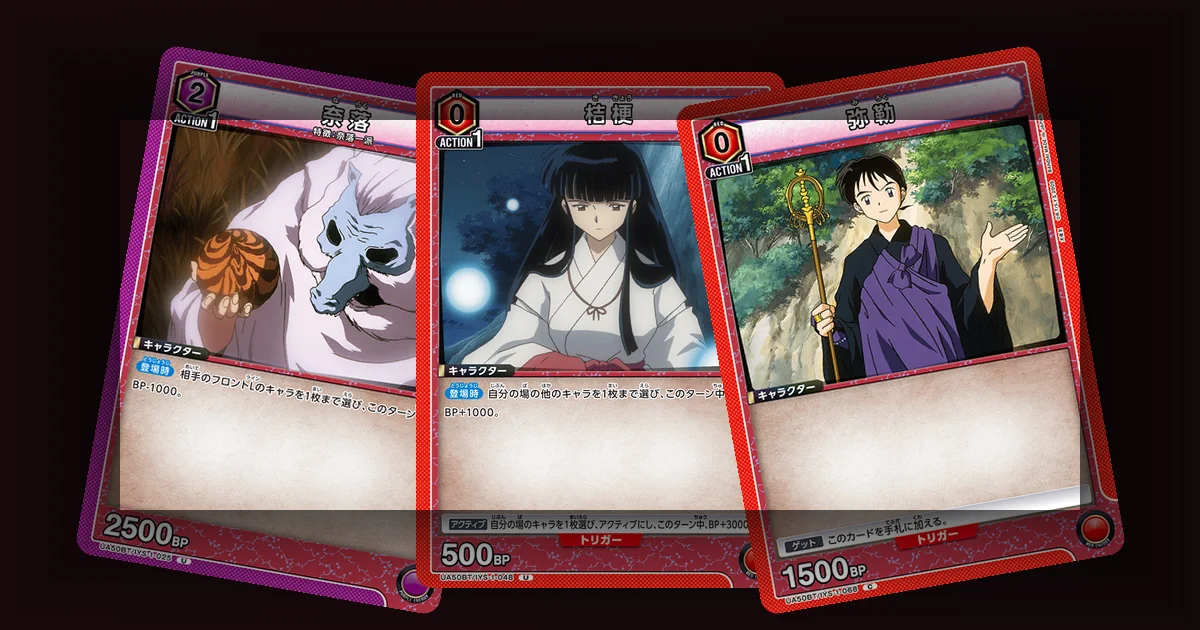
Miroku (UA50BT-068, Uncommon, also in starter deck) enters the field and places 1 Jewel Shard counter on every character you control. Run four copies. The counter stacking compounds fast across multiple Miroku plays, and because he's in the starter deck, getting started costs $17 rather than buying into expensive singles.
Kagome Higurashi (Rare, UA50BT-063 to 066 range) is the draw engine and Purification enabler. Run four copies. She keeps your hand full while advancing the counter state. Every competitive InuYasha build in JP play runs her as a 4-of regardless of archetype, which tells you how load-bearing she is.
![]() UA50BT-046
UA50BT-046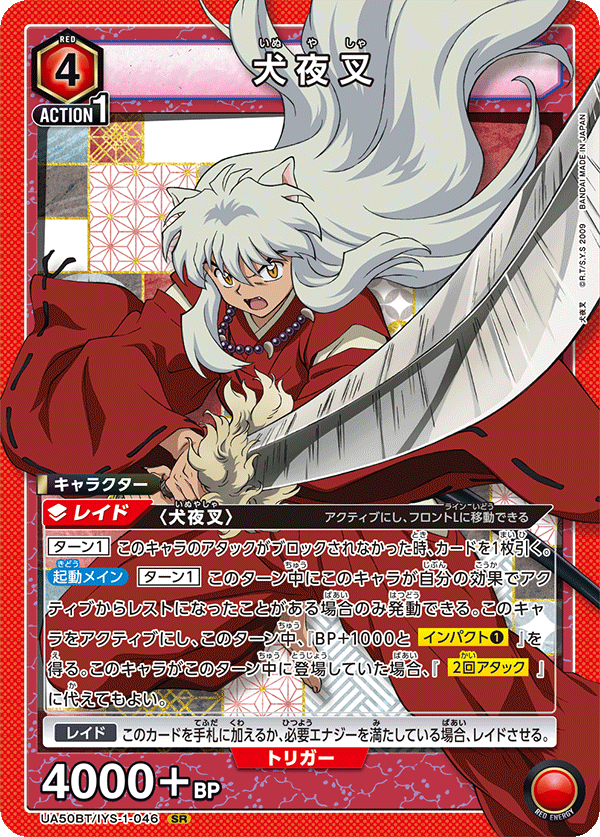 UA50BT-046 Full Demon InuYasha is the finisher. When a character reaches maximum Jewel Shard counters, Full Demon InuYasha becomes a game-ender. The JP market prices him at $40-60 precisely because Counter Rush doesn't close games without him. Two copies is standard, with some lists at three.
The turn sequence: play Miroku copies to stack counters, draw with Kagome, fire Full Demon InuYasha once the threshold hits. Clean counter acceleration lets the deck close before slower archetypes find their footing.
Counter Rush is good into most standard Union Arena defensive builds because the resolution window for Full Demon InuYasha is hard to interrupt once the counter count is established. Where it struggles: the InuYasha mirror, where your opponent runs the same counter mechanics and possibly Naraku as a tech piece to negate your counters for a turn.
For new players: buy the starter deck ($17), add 4x Kagome singles ($24-40), and then add 2x Full Demon InuYasha once your budget allows. The deck is functional without Full Demon InuYasha as a learning build, but the ceiling is significantly lower.
 Full Demon InuYasha is the Counter Rush win condition. At $40-60 JP, the price reflects how load-bearing he is to the archetype.
Archetype 2: Sesshomaru Control
Sesshomaru Control came out of JP community discussion as the alternative for players who prefer board pressure over combo resolution. Instead of racing to counter maximum, this archetype establishes an unanswerable field through Sesshomaru SR cards and then wins through sustained board advantage.
![]() UA50BT-006
UA50BT-006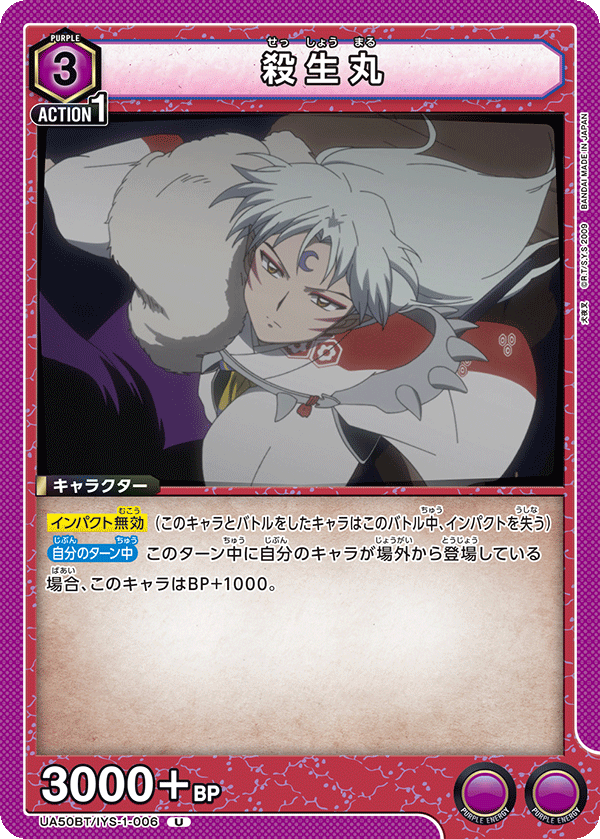 UA50BT-006 Sesshomaru provides the power-based effects that define this archetype. His role is board control: removing threats and maintaining field presence in a way that lets the game go long. JP builds treat him as the set's strongest defensive finisher, in contrast to Full Demon InuYasha's offensive burst.
![]() UA50BT-048
UA50BT-048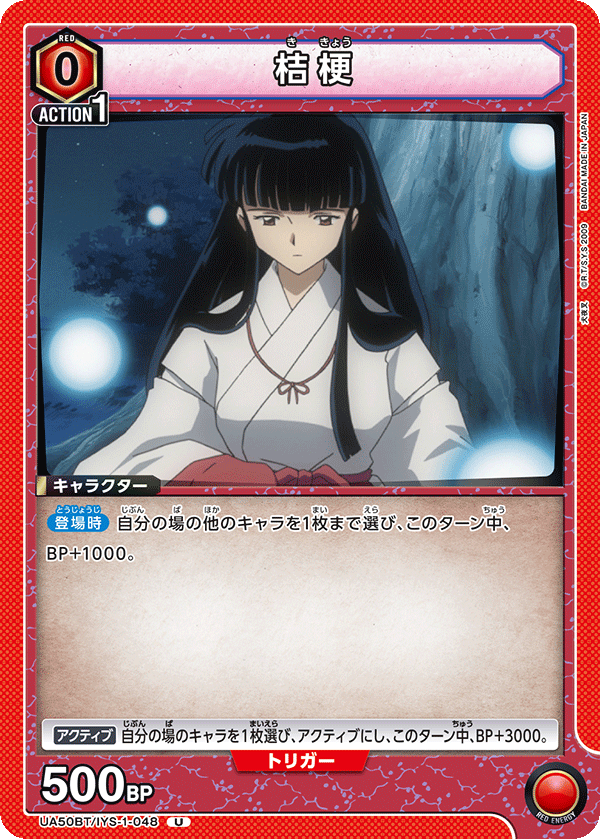 UA50BT-048 Kikyo is the archetype's secondary Purification piece. Where Kagome focuses on draw and forward tempo, Kikyo provides a defensive Purification effect that spends Jewel Shard counters for board-impacting results. JP builds typically run 2 copies. Her effect works differently from Kagome's, which gives the deck a second Purification axis in mirrors.
The control game plan: develop Sesshomaru threats, use Kikyo defensively to outlast aggressive openings, and close once the opponent runs out of answers. It's harder to learn than Counter Rush because you need to read the opponent's hand state and choose when to spend Kikyo counters versus holding for a later effect.
![]() UA50BT-025
UA50BT-025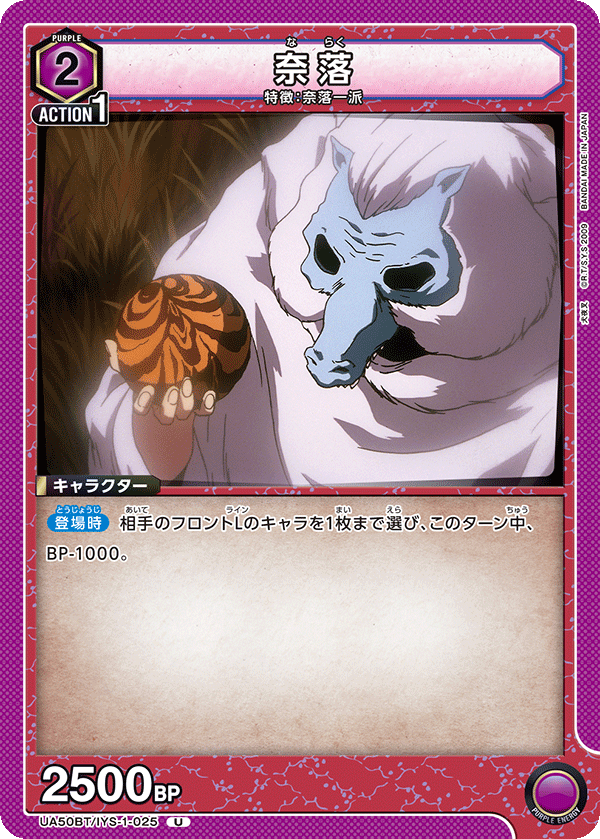 UA50BT-025 Naraku fits naturally here as a 1-of tech card. His "negate all Jewel Shard counter effects for one turn" is powerful in the InuYasha mirror and situationally useful against Kagurabachi (the current EN top deck). Sesshomaru Control is better positioned than Counter Rush to use Naraku because the archetype is already playing slowly and can afford the tempo investment.
Sesshomaru Control is the better choice if you're coming from a control background in other TCGs. If you've played control in One Piece TCG or defensive decks in Union Arena's Kagurabachi meta, the read-and-react playstyle transfers.
 Sesshomaru SR is the defensive finisher for the Control archetype. JP builds treat him as the strongest slow-game threat in the set.
GODEEPER: Sesshomaru and Kikyo's individual card roles are covered in detail in the character guide. Union Arena InuYasha Sesshomaru and Kagome Guide
Archetype 3: Hybrid builds
The third Union Arena InuYasha deck archetype runs both Full Demon InuYasha and Sesshomaru as finishers, with the Kagome draw engine handling card advantage. It gives up some speed compared to pure Counter Rush and some board stability compared to pure Sesshomaru Control in exchange for flexibility.
The logic behind Hybrid: you can adapt your close based on the opponent's response. If they're forcing Jewel Shard counter disruption to stop Full Demon InuYasha, switch to Sesshomaru. If they can handle Sesshomaru's board pressure but have no answer to counter max, press Full Demon InuYasha. Running both threats makes it harder for the opponent to tech specifically against you.
The tradeoff is card slot compression. Running 2x Full Demon InuYasha and 2x Sesshomaru SR means 4 slots dedicated to finishers that are each individually weaker than 3x of a single finisher. The Kagome engine (4x) and Miroku (4x) stay constant, leaving the flex slots to alternate between the two finisher lines.
From what JP builds have shown in early UA50BT play: Hybrid is strong but demands the most expensive cards from the set. You need both Full Demon InuYasha ($40-60) and Sesshomaru SR ($25-35) to run the archetype fully. That's roughly $130-180 in finisher singles before Kagome and supporting pieces. Budget-constrained players are better served committing to one of the first two archetypes.
Shared cards across all three archetypes
Whatever archetype you pick, these cards show up in every list:
Kagome Higurashi (Rare): 4-of in every build. She's the Purification engine and draw anchor. $6-10 JP, expected similar in EN.
Miroku (Uncommon): 4-of, preferably from the starter deck ($17 MSRP includes the full playset). He's the counter accelerator that makes the Jewel Shard mechanic consistent.
Sango (Uncommon): 3-4 copies. She's the blocker piece with a Hiraikotsu counter effect, inexpensive and widely available.
![]() UA50BT-079
UA50BT-079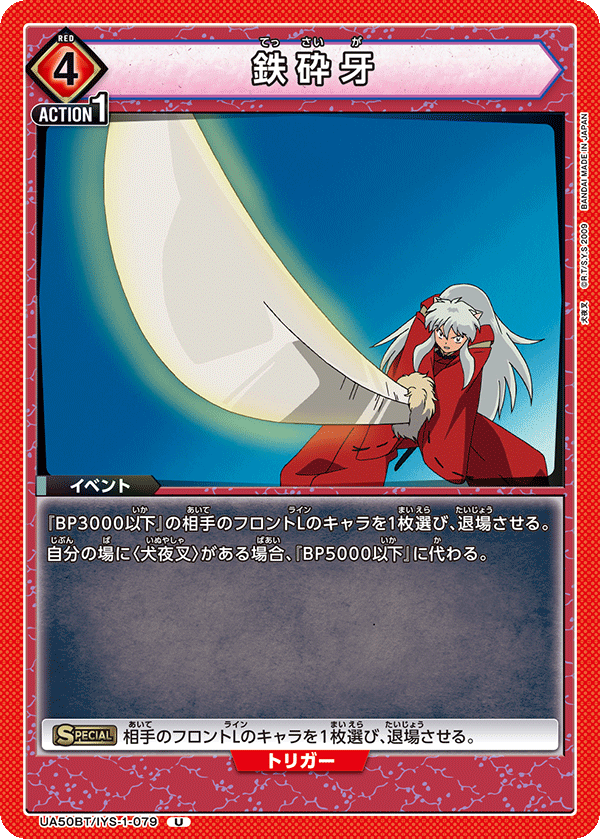 UA50BT-079 Tessaiga (event card): InuYasha's signature weapon in event card form. This slot fills a specific role in Counter Rush and Hybrid builds, with the exact count varying between 2-4 depending on list preference.
Union Arena InuYasha deck archetypes: EN launch decision guide
The EN release (August 14, 2026) will be the first time most Western players can pick up physical InuYasha cards. The good news is that JP community play gives you six weeks of data before you spend money.
Counter Rush is the safest first-deck choice: it has a clear win condition, uses the starter deck, and has the most documented JP play behind it. Sesshomaru Control is the right pick if you prefer slower gameplay. Hybrid is the high-ceiling option for experienced players who want flexibility.
The Union Arena InuYasha complete set guide covers all cards and rarity distribution if you want to map the full card pool before the August 14 EN release.
Key Takeaways
- Three archetypes from JP play: Counter Rush (Full Demon InuYasha finisher), Sesshomaru Control (board pressure), Hybrid (both finishers)
- Kagome Higurashi (Rare) and Miroku (Uncommon) are in every build. Start there.
- Counter Rush is the most accessible: starter deck gives 4x Miroku, then add Kagome and Full Demon InuYasha as singles
- Sesshomaru Control is better for experienced TCG players who prefer reading board states over following a linear combo
- Naraku (UA50BT-025) is a 1-of tech across all archetypes in InuYasha-heavy metas; the Union Arena InuYasha Naraku villain guide covers full villain builds and mirror-match usage
- EN launches August 14, 2026. JP community data has been available since May 29
- For competitive tier rankings across all three archetypes, see the Union Arena InuYasha competitive tier list based on six weeks of JP community play
Related Reading
- Union Arena InuYasha Best Cards to Pull: Full card value breakdown including all SRs and competitive singles.
- Union Arena InuYasha Sesshomaru and Kagome Guide: Individual card roles for the two key characters across all archetypes.
- Union Arena InuYasha EN Buying Guide: Where to pre-order, JP import vs. EN wait, singles strategy.
- Union Arena InuYasha Complete Set Guide: Full card list, rarity breakdown, and set overview.
- Union Arena InuYasha Pre-Order Guide: EN retailers and what to order before August 14.
Frequently Asked Questions
Q: What are the main InuYasha deck archetypes in Union Arena? A: Three archetypes from JP play: Counter Rush (Full Demon InuYasha finisher with Miroku counter stacking), Sesshomaru Control (board pressure through Sesshomaru SR and Kikyo), and Hybrid (both finisher lines, Kagome draw engine).
Q: Is Counter Rush or Sesshomaru Control better for beginners? A: Counter Rush. The line is linear: Miroku stacks counters, Kagome draws, Full Demon InuYasha closes. Sesshomaru Control requires more board-reading, which is harder on your first InuYasha deck.
Q: What is the Jewel Shard counter mechanic? A: Cards like Miroku add Jewel Shard counters to your characters. Purification abilities (Kagome, Kikyo) remove or spend them for effects. Full Demon InuYasha's game-ending ability triggers when a character reaches maximum counters.
Q: When does Union Arena InuYasha release in English? A: August 14, 2026 (UE23BT). JP released May 29, 2026 (UA50BT). Identical cards, English text.
Q: Which cards are essential for every archetype? A: Kagome Higurashi (Rare, 4x in every build) and Miroku (Uncommon, 4x, available in the starter deck).
Q: Does the starter deck help? A: Yes. The $17 starter deck contains 4x Miroku, which is the core counter accelerator. Buy the starter first, then add Kagome singles ($6-10 each) to complete the base engine before adding your chosen finisher.
Q: Can you splash Naraku into InuYasha decks? A: Yes. Naraku (UA50BT-025) negates all Jewel Shard counter effects for one turn, which is strong in mirrors. Run 1 copy as a tech piece in any of the three archetypes.
References
- Union Arena UA50BT Official Product Page, Bandai: Set contents and character list
- Union Arena North America Decklists, ExBurst.dev: Community decklists tracking
- Best Union Arena TCG Decks June 2026, josephwriteranderson.com: Current EN meta context
- r/UnionArena: JP community discussion and UA50BT play reports
- Union Arena InuYasha Booster, TCG Corner: EN pre-order and pricing reference
Was this guide helpful?
Cards in this article
About the author

TCG Deck Analyst
Former card game tournament organiser turned analyst. Covers One Piece TCG meta, deck efficiency, and card valuation. Builds spreadsheets for decks most people just play.
- Regional TCG tournament organiser
- One Piece TCG meta specialist
- Competitive deck analysis


Disclaimer
This article is published for informational and entertainment purposes. It does not constitute professional financial, legal, or technical advice. Game performance, online services, patch schedules, and store listings change. Verify critical details (pricing, system requirements, regional availability) with publishers and storefronts before you buy. Affiliate links, where present, help support our editorial work and are labelled in our affiliate disclosure.